Beyond the Hump: 11 Unforgettable Camel Ride Photo Angles for Stunning Shots
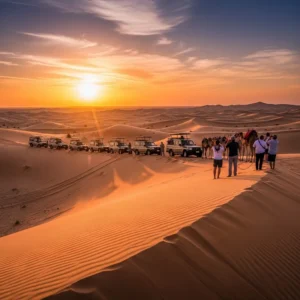
The camel ride is the quintessential desert safari experience an iconic moment that connects you to the timeless spirit of the Arabian sands. Capturing this experience in a photograph that feels as magical as the moment itself is a goal for every traveler. Too often however the resulting pictures are repetitive snapshots that fail to convey the grandeur of the animal or the epic scale of the landscape. The secret to elevating your images from simple to sensational lies in one crucial element: your perspective. By exploring different camel ride photo angles you can unlock a world of creative possibilities.
This is not just a list of tips; it is a deep dive into the art of photographic composition tailored specifically for the unique challenge and opportunity of a desert camel ride. We will move beyond the standard side-on shot and explore how changing your elevation your distance and your creative viewpoint can dramatically alter the story your image tells. Whether you are photographing from the ground or from the saddle this guide will provide you with a blueprint for mastering the camel ride photo angles that transform a simple memory into a breathtaking work of art.
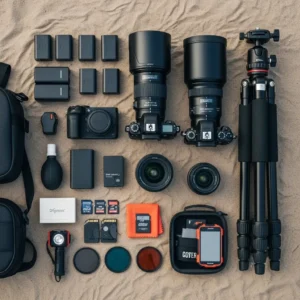
The Foundation: Essential Gear and Settings
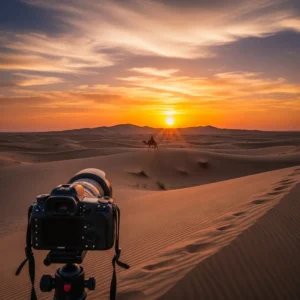
Before we explore the specific angles having your camera set up correctly is crucial. The gentle but constant motion of a camel requires a different approach than static landscape photography.
A versatile zoom lens (like a 24-105mm) is an excellent all-around choice. It allows you to capture wide scenes of the caravan and then zoom in for tighter portraits without needing to change lenses in the dusty environment.
For your camera settings consider using Shutter Priority (S or Tv) mode. Set your shutter speed to at least 1/250s or faster to freeze the motion of the camel’s gait and prevent blur. Let the camera choose the aperture for you. Also enable Continuous Autofocus (AF-C) to track the moving subject and use “Burst Mode” (taking several photos in a quick burst) to increase your chances of capturing the perfect moment with the camel’s legs in a pleasing position.
The Photographer’s Perspective: Angles from Off the Camel
When you are on the ground you have the freedom to move and control your composition completely. This is your best opportunity to capture the most dramatic and well-composed images of the camels.
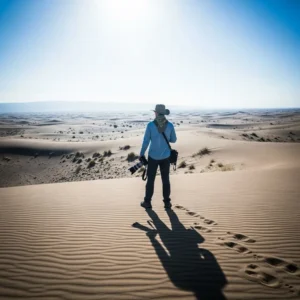
The Low Angle: Emphasizing Majesty
This is one of the most powerful camel ride photo angles. Instead of shooting from a standing height get as low to the ground as safely possible. By shooting upwards at the camel you make it appear larger more powerful and heroic against the vast sky. This angle minimizes distracting background clutter and emphasizes the animal’s impressive stature. It’s particularly effective when you can frame the camel against a clean backdrop of a dune crest and the blue or golden sky.
The Eye-Level Angle: Creating a Connection
To create a more intimate and personal portrait of the camel crouch down to get on its eye level. This angle fosters a sense of connection and equality between the viewer and the animal. It’s perfect for capturing the camel’s unique character—its long eyelashes curious expression or gentle nature. An eye-level shot turns the camel from a simple mode of transport into the main subject and personality of the photograph.
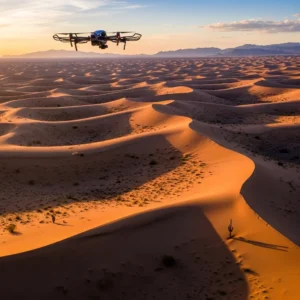
The High Angle: Showcasing the Caravan
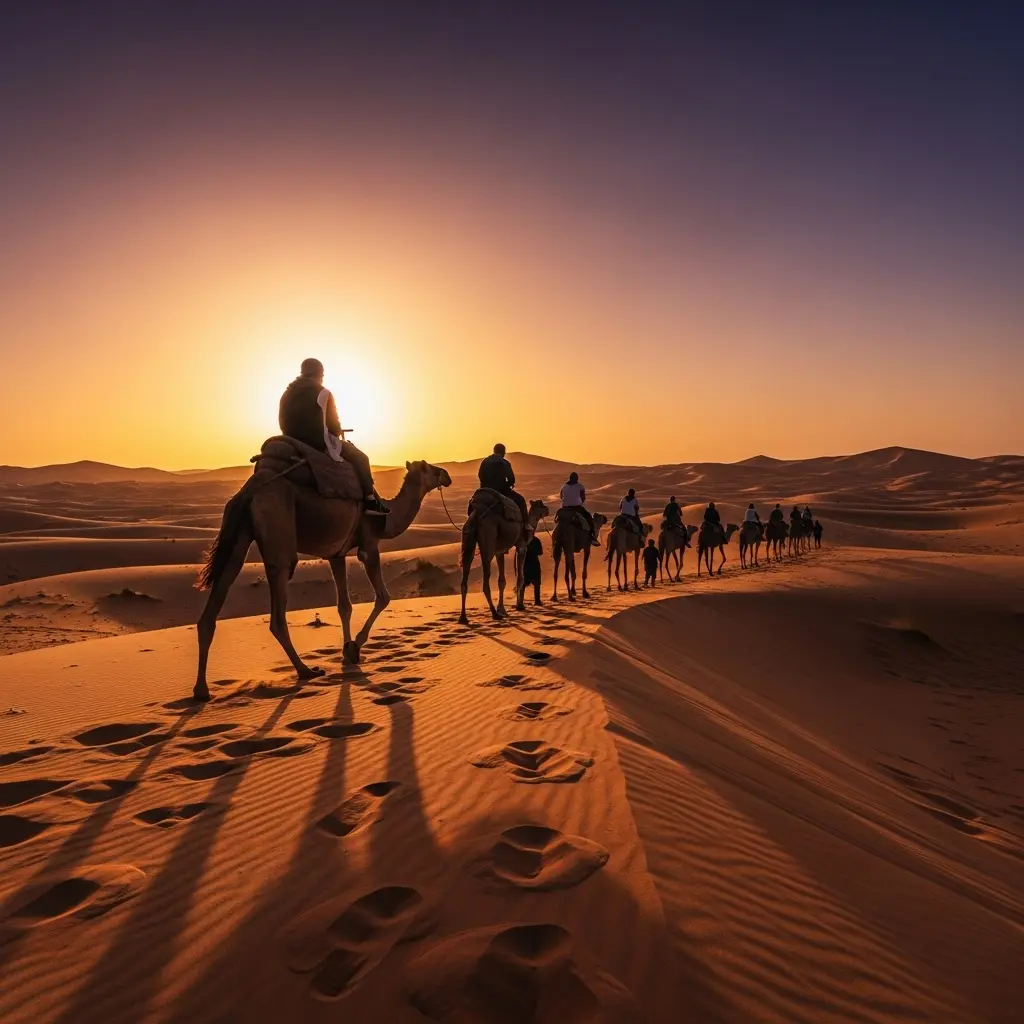
For this angle you’ll need a high vantage point like the crest of a tall sand dune. By looking down on the camel train you can capture the beautiful S-curves and patterns the caravan creates as it winds its way through the dunes. This perspective emphasizes the scale of the journey and the collective rhythm of the group. It’s a fantastic way to create an image that feels grand and tells a story of travel and exploration. This is one of the most sought-after camel ride photo angles for a reason.
The “Leading Lines” Angle: A Path Through the Dunes
Leading lines are a fundamental compositional tool that guide the viewer’s eye through an image. In the desert you are surrounded by them. Position yourself so that the line of the camel caravan itself acts as a powerful leading line moving from the corner of your frame into the distance. Alternatively the footprints left in the sand or the sharp crest of a dune can be used to create a visual path that leads the eye toward the camels.
The Head-On Angle: The Symmetrical Shot
There is a simple power in symmetry. A shot taken directly in front of a camel or a line of camels as they walk towards you can be incredibly striking. This angle creates a strong confrontational composition that is both engaging and dramatic. It works best when the lead camel is looking directly towards the camera. Use a telephoto lens to compress the perspective and make the line of camels appear more stacked and impressive.
The Rider’s View: Angles from Atop the Camel
Shooting while on a moving camel presents a unique challenge but it also offers perspectives you can’t get anywhere else. Stability is key so brace your elbows against your body and shoot in bursts.
The “Point of View” (POV) Angle: Immersive Experience
This is a classic for a reason. It puts the viewer directly in your place. Frame your shot looking forward over your camel’s head and between its ears. Capture the vast desert landscape unfolding before you. This immersive angle is one of the most popular camel ride photo angles because it perfectly captures the feeling of the experience. To make it more interesting include your own hands holding the reins in the bottom of the frame.
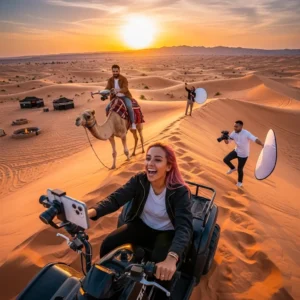
The “Fellow Traveler” Angle: Capturing Your Companions
The camel ride is a shared experience. Turn your body carefully in the saddle and photograph the other riders in your group. Capture their smiles their laughter and their looks of wonder as they take in the scenery. These images often become the most cherished memories of the trip because they capture the human element of the adventure.
The “Selfie” Angle (Done Right)
Go beyond a simple close-up of your face. To take a truly great camel-ride selfie use a wide-angle lens or a selfie stick to create some distance. The goal is to include not just yourself but also the head of your camel and the stunning desert scenery behind you. This provides context and turns a simple selfie into a complete environmental portrait. This is one of the most fun camel ride photo angles to experiment with.
The “Detail” Angle: Focusing on the Small Things
From your high vantage point in the saddle you have a unique view of the intricate details of the experience. Point your camera downwards and capture close-up shots of the colorful textures of the saddle blanket the traditional design of the leather harness or your own feet in the stirrups. These detail shots add a rich layer of texture and narrative to your photo collection telling a story beyond the grand vistas. A quality safari from an operator like https://royaldesertadventures.ae/ often features beautiful and authentic equipment worth capturing.
Mastering Light and Shadow: The Best Angles for Light
The quality and direction of light can completely transform a photograph. Understanding how to use the desert light is crucial for creating exceptional images.
The Silhouette Angle: Golden Hour Magic
As the sun gets low on the horizon you have the opportunity to create one of the most iconic desert images: the silhouette. Position yourself so the sun is behind the camel train. Place the camels on the crest of a dune. Now expose your photo for the bright sky not the camels. Your camera will render the camels and the dune as a dark dramatic shape against the fiery colors of the sunset. This is a must-capture shot and one of the most dramatic camel ride photo angles.
The “Long Shadow” Angle: The Graphic Image
In the early morning and late afternoon the low sun casts incredibly long and dramatic shadows across the sand. Instead of just photographing the camels themselves make their shadows the subject of your photo. A high-angle shot looking down on the caravan can reveal a beautiful pattern of long dark shadows stretching across the textured sand. This creates a more abstract graphic and visually interesting photograph.
Beyond the Single Shot: Storytelling with Your Angles
The best photographers don’t just take pictures; they tell stories. By thinking about your shots as a sequence you can create a more powerful narrative.
The Interaction Angle: The Human and Animal Bond
Look for the moments of connection. One of the most powerful camel ride photo angles involves capturing the relationship between the camels and their handlers or riders. A photo of a Bedouin guide gently leading their camel a rider patting their camel’s neck or a close-up shot looking into the animal’s gentle eye can convey a powerful sense of empathy and partnership. These are the images that have real emotional resonance. Operators like https://dubaidesertsafarie.com/ and https://hafiztourism.com/ have experienced handlers whose connection with the animals can be a beautiful subject.
By moving beyond the first and most obvious shot and deliberately exploring these different camel ride photo angles you will begin to see the desert safari in a new light. You will learn to capture not just what it looked like but what it felt like—the majesty the journey the connection and the unforgettable magic of the Arabian desert.
Frequently Asked Questions (FAQs)
1. What is the best shutter speed to use to avoid blurry photos while on a moving camel?
To freeze the motion and avoid blur a fast shutter speed is essential. A good starting point is 1/250th of a second. However if you are using a longer telephoto lens you should aim for an even faster speed like 1/500s or 1/1000s. Using Shutter Priority (S or Tv) mode is an excellent way to ensure your shutter speed stays high.
2. How do I get a blurry background (bokeh) for my camel portraits?
To achieve a blurry background you need a shallow depth of field. This is controlled by your lens’s aperture. Use a lens with a wide maximum aperture (like a 50mm f/1.8 prime lens) and shoot with the aperture wide open (at f/1.8). Also try to create some distance between the camel and the background. The further the background is the blurrier it will appear.
3. Is a wide-angle or a telephoto lens better for capturing the best camel ride photo angles?
Both have important roles. A wide-angle lens (16-35mm) is best for capturing the grand scale of the desert landscape including the entire caravan and for taking immersive POV shots from the saddle. A telephoto lens (70-200mm) is ideal for compressing the perspective making a line of camels look more impressive and for capturing intimate portraits of the camels and riders from a distance without disturbing them. A standard zoom (24-105mm) offers a good compromise.
4. What is the single biggest compositional mistake to avoid in camel photography?
The biggest mistake is “visual clutter.” This often happens when you try to include too much in the frame without a clear subject. The solution is to simplify. Before you shoot ask yourself what the main subject is—is it the camel’s expression the line of the caravan the long shadow? Then frame your shot to exclude anything that distracts from that main subject. A clean background is key.
5. How can I take a sharp photo while I’m bouncing on the camel?
It’s very challenging. First increase your shutter speed significantly (to 1/1000s or faster). Second enable your camera’s burst mode and take short bursts of 3-5 photos at a time. This increases the odds that one of them will be sharp. Third brace your arms tightly against your body to create a more stable platform. Finally try to time your shot for the smoothest part of the camel’s gait.
6. What is the best way to photograph a large group of people on a camel train?
The best angle is from a high vantage point. If possible have the group stop and then you can climb to the top of a nearby dune. Shooting from above allows you to see everyone in the line clearly and capture the beautiful pattern of the caravan against the sand. Trying to shoot a long line of people from ground level often results in people being hidden behind one another.
7. How do I make the sand dunes in the background look more dramatic?
To create drama you need shadows and compression. Shoot during the golden hour when the low sun creates deep shadows that define the shape of the dunes. Additionally use a telephoto lens. A telephoto lens has a “compressing” effect that makes distant dunes appear larger and closer together creating a powerful layered look. This is a classic technique to avoid flat-looking landscapes.
8. When taking a low-angle shot how do I get the sky to be a rich blue?
A rich blue sky is best achieved with a Circular Polarizing (CPL) filter. This filter attaches to the front of your lens and when rotated it cuts down on atmospheric haze and glare which dramatically enhances the saturation of the blue sky. For the strongest effect shoot with the sun at a 90-degree angle to your camera (to your left or right).
9. What’s the best technique for capturing a camel silhouette?
Timing and metering are key. You must shoot during the few minutes when the sun is right on the horizon. Position yourself so the camel is between you and the sun. Switch your camera’s metering mode to “Spot Metering.” Aim your focus point at the brightest part of the sky and half-press the shutter to lock the exposure. Then recompose your shot with the camel in place and take the photo. This will ensure the sky is perfectly exposed and the camel is a dark solid shape.
10. How can I capture the camel’s personality?
To capture personality you need to get closer and focus on the details. Use a telephoto lens to take a tight headshot. Focus specifically on the eyes. Wait for a moment when the camel makes a unique expression—chewing its cud turning its head curiously or blinking slowly. An eye-level angle is also crucial for creating a feeling of connection rather than just observation.
11. What are some good “storytelling” details to capture?
Think about the elements that make up the whole experience. Capture a close-up of the guide’s weathered hands on the reins the intricate patterns of the saddle the texture of the camel’s fur the footprints being left in the sand and the happy expressions of your fellow travelers. Combining these detail shots with your wider landscape shots creates a much richer and more complete story.
12. Is it better to have people in my camel photos or just the animals?
This depends on the story you want to tell. Photos of just the camels in the vast empty landscape can convey a sense of wildness and timelessness. Photos with people add a sense of scale adventure and human connection. A great collection will have a mix of both. Don’t forget to get shots of the experienced Bedouin guides as their presence adds a layer of authenticity.
13. How do I avoid taking the same picture everyone else does?
The key is to move your feet. Most people will take the first shot they see from a comfortable standing position. To get unique camel ride photo angles you need to deliberately seek out different perspectives. Lie on the ground. Climb a dune. Walk to the front of the caravan. Walk to the back. Look for details that others might miss. Your unique position is what will create a unique photograph.
14. What is the best focus setting for a line of camels walking?
Use Continuous Autofocus (AF-C or AI Servo) so the camera will keep tracking the moving camels. For your focus area mode use a “Zone AF” or “Dynamic Area AF” setting. This uses a small cluster of focus points which makes it easier to keep the focus locked on the lead camel’s head as it moves around the frame.
15. My photos from the saddle are always crooked. How can I fix this?
It’s very difficult to keep the horizon straight while on a moving camel. The best solution is to turn on your camera’s electronic level or grid display to use as a guide. Shoot a little wider than you normally would. This gives you room to easily straighten the image in post-processing without losing important parts of the composition.
16. What’s a creative way to use shadows in camel photography?
Instead of just including shadows make them the primary subject. In the late afternoon the shadows will be very long and stretched. Find an angle where you can photograph just the shadows of the camels on the sand without including the camels themselves. This creates a mysterious abstract and highly creative image.
17. How do I get a good photo of myself riding the camel?
If you are traveling with someone teach them the basics of how to use your camera and ask them to take photos of you from another camel. For a selfie use a wide-angle lens and try different angles—not just straight on. A shot from a slightly higher angle can be more flattering and can better include the camel and the background.
18. What’s the biggest lighting mistake people make?
The biggest mistake is shooting under the harsh midday sun. The light is unflattering creates harsh shadows and washes out the color of the sand. The best light is always during the golden hour—the hour just before sunset. Booking an evening or sunset safari is the easiest way to ensure you are in the desert during the most magical light.
19. Can I get good shots if the sky is overcast?
Yes. An overcast sky acts like a giant softbox creating soft diffused light with no harsh shadows. This type of light is actually perfect for portraits of both the camels and the riders as it’s very flattering. You won’t get dramatic sunsets but you can get beautiful moody landscapes and excellent portraits.
20. What is the most important tip for finding the best camel ride photo angles?
The single most important tip is to be curious and to experiment constantly. Don’t just take one photo and move on. Once you find a subject take a photo from a standing position. Then take one from a low angle. Then a high angle. Take a wide shot and a telephoto shot. The more you experiment and explore different perspectives the more likely you are to discover that one truly unique and breathtaking angle that no one else saw.