Desert Photography Spots: Unlocking the Ultimate Arabian Photo Locations
The Arabian Desert offers a canvas of immense scale, unparalleled texture, and dramatic light. It is a dream location for every photographer.
However, capturing truly stunning images requires more than just luck. It demands knowing the best Desert Photography Spots and understanding the light.
This guide provides 14 powerful secrets. We break down the prime locations and essential technical tips.
Mastering these secrets ensures your photos are not just snapshots. They become professional Desert Landscape Pictures.
1. Timing is Everything: Golden Hour Desert Mastery
The single most important factor in Desert Photography Spots is the light. The quality of light changes minute by minute.
H3: The Golden Hour Desert Window
The Golden Hour Desert window occurs right after sunrise and just before sunset. This is the only time to shoot portraits and landscapes.
The low angle of the sun creates long, sharp shadows. These shadows define the texture of the dunes.
The light is soft, warm, and intensely flattering. This is the optimal time for an Arabian Desert Photos session.
H3: The Blue Hour Secret
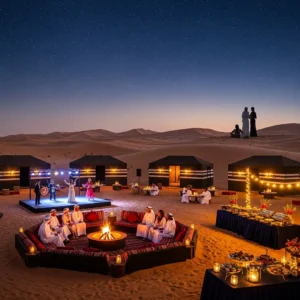
The Blue Hour follows the sunset. The sky deepens to a rich indigo.
This cool light is perfect for silhouettes and low-light Desert Photography Guide shots.
The deep blue contrast against the warm foreground lights of a camp is stunning.
H4: Avoiding Midday Damage
Never attempt serious Desert Photography Spots shooting between 11:00 AM and 3:00 PM. The light is harsh, flat, and unflattering.
The intensity of the sun can also damage sensitive camera equipment if left exposed.
2. Location Analysis: Best Photo Location Dubai and Abu Dhabi
The choice of location dictates the color palette and the type of Desert Photography Spots you capture.
H3: Dubai’s Red Dune Photography Zone
The Red Dunes of Al Badayer (Dubai/Sharjah border) are famous for their intense color. This is a prime Photo Shoot Locations zone.
The high concentration of iron oxide gives the sand a deep crimson hue.
This unique color provides a superior backdrop for Red Dune Photography.
The visual contrast is excellent against the blue sky.
H3: Abu Dhabi’s Empty Quarter (Liwa)
While further away, the vast Empty Quarter near Abu Dhabi offers unparalleled scale.
The dunes here are monumental, often reaching heights of 300 meters.
This location is perfect for grand, sweeping Desert Landscape Pictures.
This scale makes it an Ultimate Photo Spots choice for professionals.
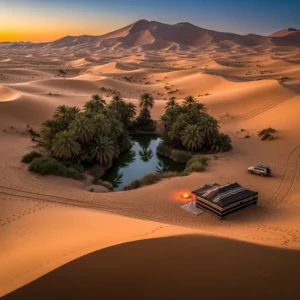
H4: Conservation Reserve Seclusion
The Dubai Desert Conservation Reserve (DDCR) offers pristine, Untouched Sands.
Access is restricted, minimizing human footprints and vehicle tracks.
This seclusion is key to capturing clean, natural Arabian Desert Photos.
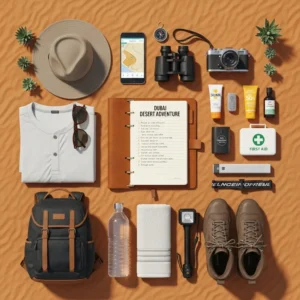
3. Gear and Protection: Desert Photography Guide Essentials
Proper gear protection is crucial. Sand is highly abrasive and damaging to equipment.
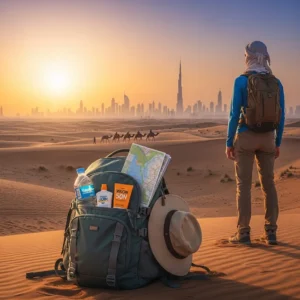
H3: Essential Safari Photography Gear
A wide-angle lens (16–35mm) is essential for capturing the vastness of the dunes.
A telephoto lens (70–200mm) helps compress the landscape, making dunes look closer together.
A sturdy tripod is mandatory for long exposure and low-light shooting.
This Desert Photography Guide ensures you have the right tools.
H3: Anti-Sand Protocol
Use sealed plastic bags (zip-locks) to store cameras and lenses when not in use.
Never change lenses in the open air; do so inside a vehicle or a sheltered area.
Carry a rubber blower bulb to remove fine sand particles without scratching the lens.
This diligence protects your investment in Desert Photography Spots.
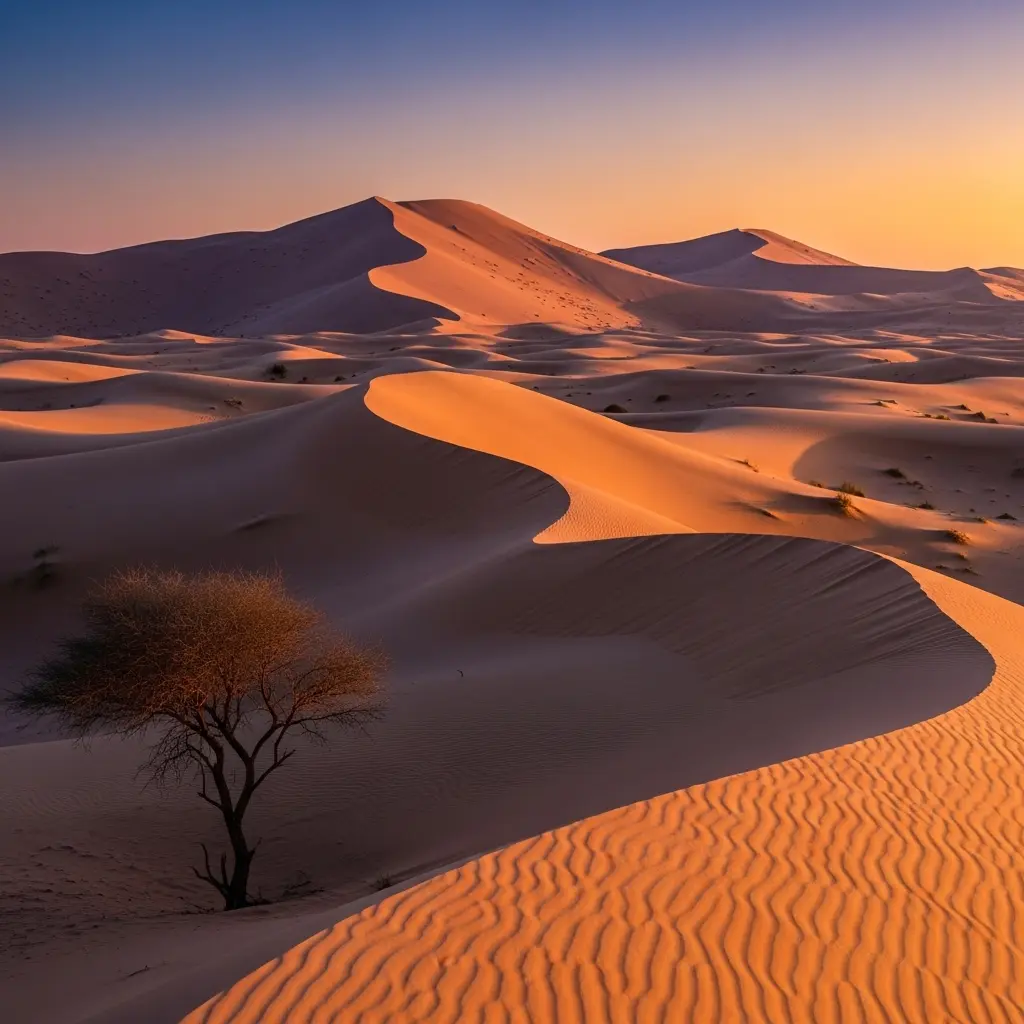
4. Composition Secrets: Sunset Photography Tips and Scale
Mastering composition elevates your Sunset Photography Tips from good to great.
H3: Using Leading Lines and Texture
Use the sharp, curving crests of the dunes as leading lines. These lines draw the viewer’s eye into the image.
Shoot with side-lighting (during the Golden Hour) to emphasize the beautiful texture and ripples in the sand.
This technique is fundamental for dynamic Desert Landscape Pictures.
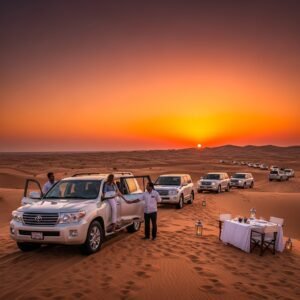
H3: Silhouettes and Scale
The best Sunset Photography Tips involve silhouettes. Position your subject (camel, person, tent) against the brightest part of the sky.
This emphasizes the subject’s shape and provides a stunning contrast.
Including a small human figure gives scale to the monumental Arabian Desert Photos.
H4: The Horizon Line
The horizon should be placed along the upper or lower third line of the frame. This adheres to the Rule of Thirds.
Avoid placing the horizon dead center. This simple rule adds visual interest to your shot.
5. Advanced Techniques: Red Dune Photography and Motion
These techniques add visual interest and drama to your Desert Photography Spots.
H3: Red Dune Photography Saturation
To maximize the color in Red Dune Photography, slightly boost the ‘Temperature’ (warmth) and ‘Saturation’ sliders in post-processing.
This intensifies the crimson hue, making your images stand out.
Careful editing enhances the drama of the Best Photo Location Dubai.
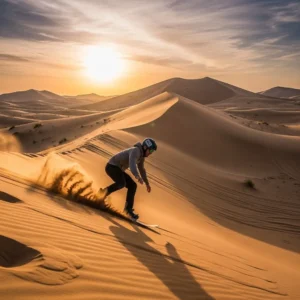
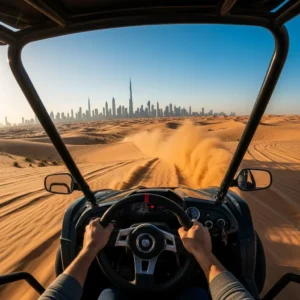
H3: Freezing Action (Dune Bashing)
Use a fast shutter speed (1/1000th of a second or faster) to freeze the motion of vehicles or sand spray.
This captures the high-energy excitement of the Desert Safari Experience.
This is crucial for sharp Photo Shoot Locations.
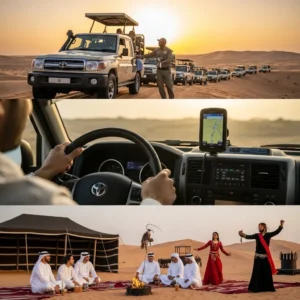
6. Subject Selection: Iconic Photo Shoot Locations
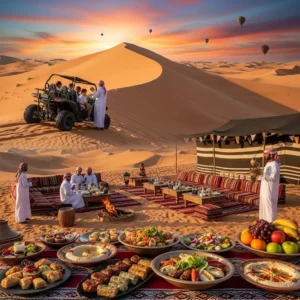
The most iconic Photo Shoot Locations include traditional elements that anchor the image culturally.
H3: Camels and Caravans
The classic Camel Ride shot is best captured with a telephoto lens, compressing the distance between camels.
A long line of camels walking along a dune crest is a perfect Arabian Desert Photos subject.
The gentle movement adds visual poetry to the scene.
H3: Falconry Display
The demonstration of traditional falconry provides a unique action shot.
Capture the falcon mid-dive against the clear sky for a powerful image.
This is a signature element of the Best Photo Location Dubai.
H4: Traditional Attire
Utilize the traditional attire (Thobes and Abayas) provided at the safari camp.
The flowing fabric adds a dynamic element to portraiture against the desert.
This adds authenticity to your Desert Photography Guide.
7. Booking Strategy: Securing Your Best Photo Location Dubai
The best photos require booking with an operator who understands a photographer’s needs.
H3: Private Tours for Control
Book a private or specialized photo tour to ensure maximum time and location control.
Luxury operators, such as those at https://royaldesertadventures.ae/, guarantee exclusive viewing spots.
This removes the constraint of group schedules and crowded areas.
H3: External Vetting for Quality
Check reviews on https://dubaidesertsafarie.com/ to ensure the guide is patient and willing to stop for photos.
A good Desert Photography Guide knows the prime vantage points.
This vetting is crucial for a successful Desert Photo Experience.
8. Post-Processing: Editing for the Ultimate Photo Spots
Editing is crucial for refining the colors and textures of the Ultimate Photo Spots.
H3: Enhancing Shadow Detail
The shadows in the desert are often deep. Lift the shadows slightly in post-processing to reveal detail.
Be careful not to over-brighten, as this can flatten the beautiful texture of the sand.
This subtle refinement enhances the Desert Landscape Pictures.
H4: Color Correction
Use the HSL (Hue, Saturation, Luminance) sliders to enhance the orange tones in the sand and the blue tones in the sky.
This emphasizes the contrast captured during Golden Hour Photography.
9. Advanced Location: Desert Photography Spots in the DDCR
Accessing the Dubai Desert Conservation Reserve (DDCR) provides unique Desert Photography Spots.
H3: Wildlife Photography
The DDCR is home to protected Arabian Oryx and Gazelles. Capturing these animals requires a powerful telephoto lens.
This specialized Desert Photography Guide is only available through authorized operators.
This provides unique content for Arabian Desert Photos.
H4: Pristine Sand
The DDCR is virtually untouched by large commercial groups. The sand is often cleaner and more pristine.
The unspoiled environment offers unique Desert Landscape Pictures.
10. Red Dune Photography: Maximizing the Crimson Palette
The vibrant color requires specific attention to maximize the Red Dune Photography.
H3: Backlighting Technique
Use backlighting (shooting with the sun slightly behind the subject) to make the sand appear almost luminous.
This emphasizes the deep crimson hue of the Red Dune Photography and creates a glow effect.
This powerful technique works best during the Golden Hour.
H4: Color Pop
In editing, slightly push the red and yellow primary colors to intensify the dramatic look.
The saturation levels should be higher than for normal photography.
11. Ethical Photography: Respecting Photo Shoot Locations
Your respect for the land and the people must be prioritized.
H3: Leave No Trace
Follow the golden rule of Photo Shoot Locations: take all trash with you.
Do not disturb the natural flow of the sand or damage any desert flora.
A respectful approach preserves the beauty of the Best Photo Location Dubai.
H4: People and Privacy
Always respect the privacy of locals and performers. Ask for permission before taking close-up shots.
Use long lenses to capture genuine moments without being intrusive.
12. Planning Tables: Photography Timing and Gear
Use this table as your guide for Desert Photography Guide essentials.
| Time of Day | Light Quality | Ideal Subject | Essential Gear |
| Sunrise (Blue Hour) | Cool, flat, high contrast | Silhouettes, long shadows | Tripod, Wide Lens |
| Golden Hour (Sunset) | Warm, directional, soft | Portraits, Red Dune Photography, Camels | Telephoto/Wide Lens, Tripod |
| Night (Post-Show) | Very low light, star clarity | Desert Night Sky, Camp Lanterns | Fast Lens (f/2.8), Sturdy Tripod |
13. The Final Word on Ultimate Photo Spots
The Arabian Desert offers an unparalleled aesthetic. Your Desert Photo Experience should be as vast as the landscape itself.
Choose your operator wisely. Plan your light perfectly. Shoot creatively.
The result will be spectacular Desert Landscape Pictures that last a lifetime.
14. Vetting External Resources for Photo Tours
Use external resources like https://hafiztourism.com/ to validate the quality of photography tours.
Check reviews for specific praise regarding the guide’s patience and knowledge of the Best Photo Location Dubai.
Frequently Asked Questions (FAQs) – Long Answers
1. What is the single most important technical setting a beginner must master for successful Desert Photography Spots during the Golden Hour?
The single most important technical setting a beginner must master for successful Desert Photography Spots during the Golden Hour is Exposure Compensation. The bright sand and sky often trick the camera’s light meter, causing the image to underexpose (making the sand look dark gray). To correct this, the photographer should manually increase the exposure compensation to +1/3 or +2/3 stop. This simple adjustment brightens the entire scene, ensuring the sand glows with its intended warm, golden color, which is vital for great Desert Landscape Pictures.
2. Why is a wide-angle lens (e.g., 16–35mm) essential for capturing the vast scale and immensity of the Arabian Desert Photos?
A wide-angle lens is essential for capturing the vast scale and immensity of the Arabian Desert Photos because it maximizes the Field of View (FOV) and exaggerates perspective. The wide FOV allows the photographer to include sweeping foreground elements (sand ripples, footprints) and still capture the distant horizon, creating immense depth. This technique makes the viewer feel small in comparison to the towering dunes and the vast, open sky, which is the primary emotional impact of Desert Photography Spots.
3. How can a photographer ensure their equipment is adequately protected from the abrasive sand while actively shooting during a Desert Photo Experience?
A photographer ensures equipment protection by minimizing exposure and cleaning safely. Strategy: Use UV filters as sacrificial protection on all lenses. When shooting, use a protective rain sleeve or plastic bag over the camera body. Crucially: Only use a non-contact rubber air blower (never a cloth) to remove sand particles. Avoid changing lenses in the open air, as this is the fastest way to damage the sensor, compromising the entire Desert Photo Experience.
4. What are the key differences between the light during the Golden Hour and the Blue Hour, and what kind of Desert Landscape Pictures should be captured during each?
Golden Hour: The light is warm, soft, and directional. It is ideal for Desert Landscape Pictures showing texture, rich color saturation, and warm skin tones in portraits. Blue Hour: The light is cool, deep blue, and ambient. It is ideal for silhouettes against the horizon, long exposures of city lights in the distance, and capturing the clean, dramatic lines of the dunes without the distracting sun flare. Both times offer essential, distinct aesthetics for Desert Photography Guide efforts.
5. What unique logistical advantages does booking a private photo tour through https://royaldesertadventures.ae/ offer for photographers?
Booking through https://royaldesertadventures.ae/ offers unique logistical advantages, primarily time control and exclusive access. Advantages: The Private Photo Shoot Dubai ensures the schedule is tailored to the light, not the group. The guide can access secluded Photo Shoot Locations far from crowded areas. This eliminates the need to wait in line or compete with other tourists for the best vantage point, guaranteeing an uninterrupted and highly efficient Desert Photo Experience.
6. How does using a telephoto lens (e.g., 200mm) enhance Red Dune Photography and create a more dramatic sense of depth?
Using a telephoto lens enhances Red Dune Photography by employing perspective compression. The telephoto lens makes objects in the foreground and background appear much closer together. When shooting the Red Dunes, this technique stacks the layers of dunes, making the landscape look denser, taller, and more dramatic. The sun, when placed near the horizon, also appears significantly larger, intensifying the Red Dune Photography color and emotional impact.
7. How can a traveler use the external link https://dubaidesertsafarie.com/ to vet a tour operator’s commitment to providing excellent Desert Photo Guide service?
A traveler can use the external link https://dubaidesertsafarie.com/ to vet a tour operator’s commitment to excellent Desert Photo Guide service by searching customer reviews for specific keywords. Look for phrases like “driver was patient,” “knew the best photo spots,” “helped take pictures,” or “allowed time for sunset.” Consistent positive feedback on the guide’s willingness to accommodate photography indicates a company that prioritizes the visual experience.
8. What are the ethical guidelines that must be followed when photographing the cultural activities and people during a Desert Photo Experience?
Ethical guidelines during a Desert Photo Experience demand respect and consent. Rule 1: Always ask for permission before taking close-up photographs of local people, especially women or children. Rule 2: Avoid using intrusive flash photography during cultural performances (like the Tanoura Dance). Rule 3: Maintain a respectful distance and avoid taking photos of any religious sites or private residences. This mindful approach ensures Arabian Desert Photos are captured with cultural integrity.
9. What simple posing and styling Desert Photo Tips can a beginner follow to ensure their subjects look good against the vast desert backdrop?
Simple posing and styling Desert Photo Tips for beginners are simplicity and movement. 1. Style: Wear light, flowing fabrics (like a shawl or dress) in solid colors (white, black, or red) to contrast the sand. 2. Posing: Avoid standing straight; engage in natural movement—walking away from the camera, looking towards the sunset, or jumping slightly. 3. Silhouette: Position the subject to stand alone against the horizon during the Golden Hour to emphasize their size against the desert’s scale.
10. How do Photo Shoot Locations within the DDCR (Conservation Reserve) differ from commercial spots, and what special gear is needed for wildlife photography?
Photo Shoot Locations within the DDCR differ by being pristine, secluded, and offering wildlife opportunities. Difference: They are restricted, requiring a licensed guide. The sand is often untouched by vehicle tracks. Gear: For wildlife photography (Oryx, gazelles), a specialized telephoto lens (300mm or longer) is necessary to capture subjects from a safe, non-intrusive distance. This type of photography is unique to the conservation area.
11. Explain the process of using the “leading lines” technique to improve the composition of Desert Landscape Shots.
The “leading lines” technique improves Desert Landscape Shots by using natural elements to guide the viewer’s eye into the image. Process: Position the camera so that the natural lines of the scene—such as the sharp crest of a dune, a set of tire tracks (if included for scale), or the shadow cast by a distant fence—start at the bottom or side of the frame and draw the eye toward the primary focal point (e.g., the sun, a lone figure, or the horizon). This adds depth, movement, and sophistication to the composition.
12. What are the benefits of setting your camera’s White Balance manually (e.g., to ‘Cloudy’) instead of using Auto White Balance for Sunset Photography Tips?
Setting the White Balance manually (e.g., to ‘Cloudy’ or ‘Shade’) is crucial for Sunset Photography Tips because Auto White Balance (AWB) works to neutralize warm tones. During the sunset’s golden hour, the rich, warm, orange light is the desired effect. AWB will incorrectly perceive this warmth as an error and attempt to “cool down” the image, adding blue. Manually setting the White Balance to a warmer preset enhances the natural reds and oranges, preserving the beautiful emotional color of the sunset.
13. What precautions should be taken to ensure Camel Ride Photos are safe and respectful of the animals and their handlers?
Precautions for safe and respectful Camel Ride Photos are: 1. Handler Permission: Always ask the camel handler before getting close to the animal or posing directly beside it. 2. No Flash: Avoid using flash photography directly in the camel’s face, as it can startle the animal. 3. Secure Camera: Ensure your camera or phone is secured with a strap when mounting or dismounting the camel, as jerky movements can cause you to drop the device. 4. Maintain Distance: Do not attempt to feed or touch the camel without the handler’s direct permission.
14. How does the choice of footwear affect the success and comfort of your Desert Photo Experience, particularly for ascending dunes?
The choice of footwear is crucial for a comfortable and successful Desert Photo Experience. Impact: Ascending soft sand dunes to reach the Best Desert Shots is physically demanding. Wearing closed-toe shoes or lightweight trainers with good grip (shallow lugs) provides stability and prevents the sand from scalding your feet. Sandals or open shoes are impractical and will fill with sand, causing blisters and making the necessary uphill walk to the Desert Photography Spots extremely difficult.
15. When editing Desert Photo Experience images, what specific post-processing techniques should be used to enhance the clarity and depth of the Desert Landscape Pictures?
When Editing Desert Photos, techniques to enhance clarity and depth are essential. Technique 1 (Clarity/Texture): Use the ‘Clarity’ and ‘Texture’ sliders modestly (around +15 to +30) to bring out the fine grain of the sand and define the edges of the dunes. Technique 2 (Contrast): Slightly increase the overall contrast to deepen the shadows and make the colors pop. Technique 3 (Dehaze): Use the ‘Dehaze’ slider (if available) to cut through any atmospheric haze, which instantly improves the sharpness of the distant horizon and the depth of the Desert Landscape Pictures.