Mastering the Sands of Light: An In-Depth Guide to Your Desert Photography Safari
A desert photography safari is an expedition into a world of profound minimalism and dramatic light. It’s a journey that challenges photographers to see beyond the apparent emptiness and discover a landscape rich with texture, form, and ever-changing color. The desert is a canvas where the sun is the brush, painting the dunes in fleeting hues of gold, orange, and violet. Capturing this magic requires more than just a camera; it demands patience, technical skill, and a deep appreciation for the subtle beauty of an arid world.
This guide is designed for the aspiring and seasoned photographer alike, offering a comprehensive roadmap to mastering the art of desert photography. We will move far beyond simple snapshots, delving into the essential gear you’ll need to protect and perform, the compositional theories that transform a good photo into a great one, and the advanced techniques required to capture everything from the blazing sunset to the star-filled night sky. A desert photography safari is a creative pursuit, an opportunity to create images that evoke a sense of wonder and raw, natural beauty. Prepare to harness the light and immortalize the soul of the desert.
Why a Desert Photography Safari is a Unique Challenge
The desert environment, while visually stunning, presents a unique set of challenges that can test both the photographer and their equipment. Understanding these obstacles is the first step toward overcoming them and leveraging them to your creative advantage. A successful desert photography safari is born from preparation and respect for the environment.
The Dynamic Nature of Light
Light in the desert is intense and changes with incredible speed. The midday sun creates harsh, unflattering shadows and blows out highlights, making it the most challenging time to shoot. Conversely, the “golden hours” after sunrise and before sunset offer soft, warm light that accentuates the curves and ripples of the dunes, but this perfect light is fleeting. Photographers must be ready to work quickly and decisively.
Dealing with Harsh Conditions
The desert is an environment of extremes. Intense heat can drain camera batteries and pose a risk to the photographer’s health. Fine, blowing sand is the natural enemy of sensitive camera gear, capable of working its way into lenses, sensors, and camera bodies, causing significant damage. Sudden gusts of wind can also destabilize tripods, leading to blurry images.
The Minimalist Aesthetic: Finding Compositions
The very thing that makes the desert beautiful—its vast, uncluttered expanse—can also make it difficult to compose a compelling photograph. Without obvious focal points like trees or buildings, photographers must train their eye to see the subtle compositions offered by leading lines, S-curves in the dunes, and the interplay of light and shadow. A desert photography safari is an exercise in finding beauty in simplicity. Many guided tours, such as those offered by https://royaldesertadventures.ae/, specifically cater to photographers by visiting locations with strong compositional elements.
Your Essential Camera Bag for the Dunes
Packing the right gear is critical for a successful desert photography safari. Your equipment must be versatile enough to capture wide landscapes and distant details, and robust enough to withstand the harsh conditions.
Choosing the Right Camera Body
Both DSLR and mirrorless cameras are excellent choices. The key is to have a camera that allows full manual control over exposure settings (aperture, shutter speed, and ISO). A camera with good weather sealing offers an extra layer of protection against dust and sand, which is a significant advantage on any desert photography safari.
The Holy Trinity of Lenses
To be prepared for any photographic opportunity, carrying a range of lenses is ideal.
- Wide-Angle Lens (e.g., 16-35mm): This is your workhorse for capturing the immense scale and grandeur of the desert. It’s perfect for sweeping dune scapes, dramatic skies, and astrophotography.
- Standard Zoom Lens (e.g., 24-70mm): This is the most versatile lens in your bag. It’s excellent for general landscape work, environmental portraits, and capturing scenes that require a more natural field of view, closely mimicking what the human eye sees.
- Telephoto Lens (e.g., 70-200mm): A telephoto lens is invaluable for a desert photography safari. It allows you to isolate distant details, compress the layers of dunes to create abstract patterns, and safely photograph any wildlife you might encounter, such as an Arabian Oryx or a gazelle.
The Unsung Heroes: Tripods and Filters
These accessories are not optional; they are essential for creating high-quality, professional-looking images in the desert.
- A Sturdy Tripod: This is arguably the most important accessory. It is absolutely necessary for shooting in the low light of sunrise and sunset, for capturing sharp, noise-free images at low ISOs, and for long-exposure techniques like astrophotography or creating silky smooth cloud movements. Choose a tripod that is tall enough to be comfortable but also heavy enough to remain stable in the wind.
- Circular Polarizing Filter (CPL): A polarizer is a game-changer in the desert. It works by cutting down on glare and reflections, which makes the blue in the sky deeper and more saturated, enhances the colors of the sand, and helps to manage contrast in bright sunlight.
- Neutral Density (ND) Filters: ND filters are like sunglasses for your lens. They reduce the amount of light entering the camera, allowing you to use much slower shutter speeds even in bright conditions. This can be used creatively to show the movement of clouds or to smooth out the appearance of blowing sand.
Protecting Your Gear from the Elements
Protecting your investment from sand and heat is paramount.
- Air Blower and Lens Cloths: An air blower is the safest way to remove sand from your camera and lenses without scratching them. Always have several clean microfiber cloths on hand.
- Camera Rain Cover: While it may not rain, these covers are excellent for protecting your camera from blowing sand, especially during windy conditions.
- Sealable Bags: Keep your gear in sealable bags inside your camera bag when not in use. Change lenses quickly and in a sheltered location, like inside a vehicle or with your back to the wind, to minimize the risk of dust reaching your camera’s sensor.
Drone Photography in the Desert: Rules and Tips
Drones can capture breathtaking aerial perspectives of the dunes. However, it is critical to know and follow all local regulations regarding drone flight, as many areas, especially within Dubai and Abu Dhabi, have strict no-fly zones. Always fly responsibly, respecting wildlife and the privacy of other visitors. For information on tours that may accommodate drone photography, you could inquire with operators like those found at https://dubaidesertsafarie.com/.
Compositional Techniques for a Remarkable Desert Photography Safari
With the right gear in hand, your focus can shift to the creative act of composition. The desert is a minimalist canvas, and applying classic compositional rules can help you create powerful and engaging images.
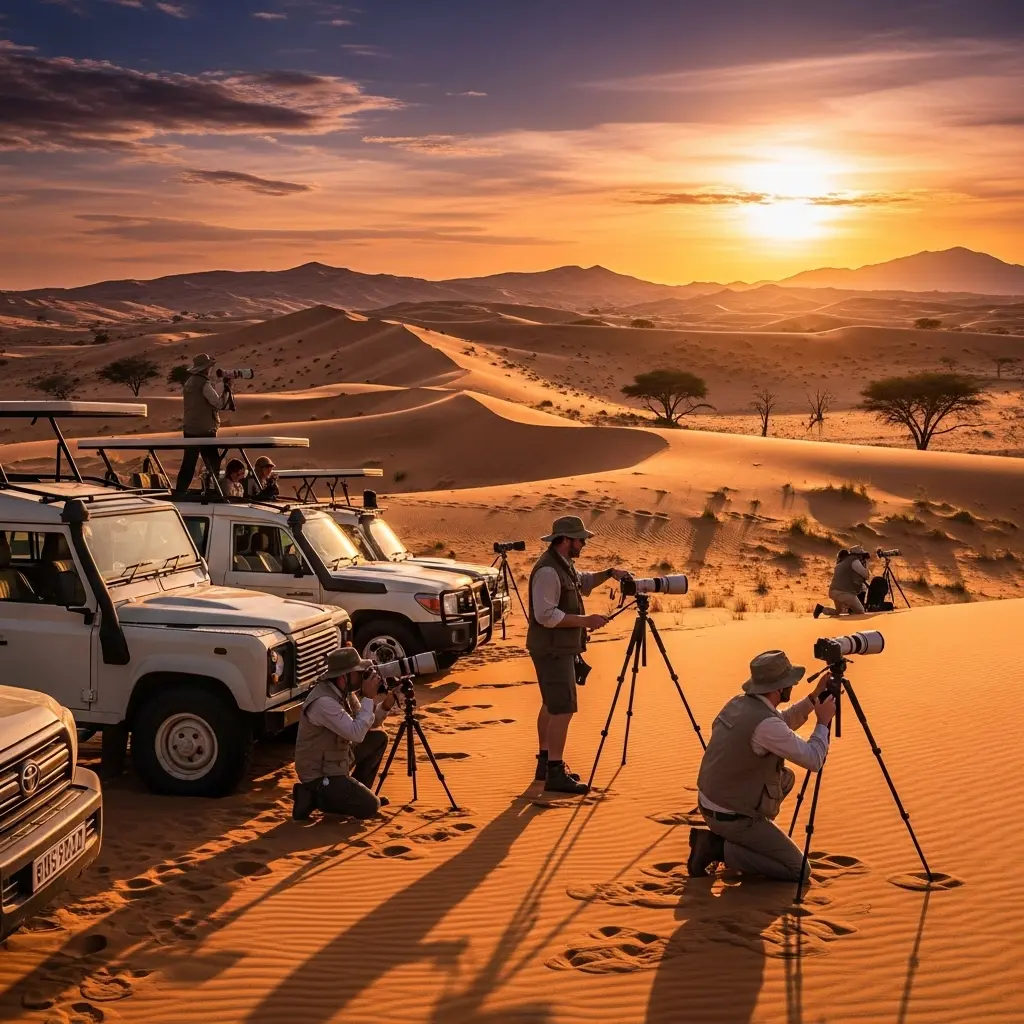
The Magic of the Golden Hour and Blue Hour
The hours surrounding sunrise and sunset are the absolute best times for a desert photography safari.
- Golden Hour: This is the period shortly after sunrise and before sunset when the sunlight is soft, warm, and directional. This low-angled light creates long, dramatic shadows that reveal the intricate textures and contours of the dunes.
- Blue Hour: This is the period just before sunrise and just after sunset when the sun is below the horizon, and the sky is filled with a soft, cool, blue light. It’s a magical time for creating serene and moody landscape images.
Using Leading Lines in the Dunes
The crests of sand dunes create natural and powerful leading lines. Compose your shot so that the sharp edge of a dune leads the viewer’s eye from the foreground deep into the frame. This technique adds a strong sense of depth and guides the viewer through your image.
The Power of S-Curves and Repetition
The desert is filled with graceful, flowing curves. An “S-curve,” formed by the winding ridge of a dune, is a classic compositional tool that creates a sense of movement and elegance. Look also for repetition in patterns, such as the endless ripples on a sand dune, which can be used to create compelling and almost abstract images.
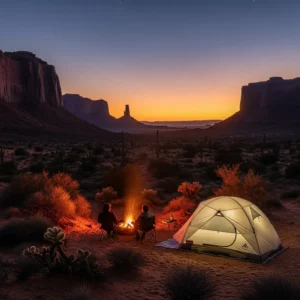
Finding and Using a Strong Foreground Element
A vast landscape can sometimes feel empty. To give your image a sense of scale and depth, find a strong element in the foreground. This could be a lone desert plant, an interesting rock, or even your own footprints in the sand. Placing this element in the bottom third of your frame helps to anchor the image and create a more immersive experience for the viewer.
The Rule of Thirds and Negative Space in a Minimalist Landscape
The Rule of Thirds is a fundamental principle. Imagine your frame is divided into a 3×3 grid. Place your key elements along these lines or at their intersections for a more balanced and dynamic composition. In the desert, you can also use negative space—the empty areas of your frame, like a clear blue sky—to emphasize your subject and create a sense of scale and solitude. A successful desert photography safari often relies on mastering this balance.
Capturing Texture and Detail in the Sand
The desert is a world of texture. The endless patterns, ripples, and cracks in the sand tell a story.
Side-lighting to Emphasize Dune Ripples
To make these textures pop, shoot when the sun is low in thesky. This side-lighting rakes across the surface of the sand, creating small, defined shadows that reveal every tiny detail. Shooting in the harsh light of midday will flatten these textures and make them invisible.
Beyond the Basic Landscape: Advanced Desert Photography
Once you are comfortable with the fundamentals, you can explore more advanced techniques to capture truly unique images during your desert photography safari.
Capturing the Perfect Desert Sunset and Sunrise
To capture a stunning sunrise or sunset, plan to be in position at least an hour beforehand.
- Don’t Overexpose the Sky: Your camera’s meter will often be fooled by the bright sky, underexposing the landscape. Use spot metering on the foreground or bracket your exposures to capture the full range of light.
- Keep Shooting After the Sun is Gone: The most vibrant colors in the sky often appear 10-20 minutes after the sun has set. Don’t pack up too early.
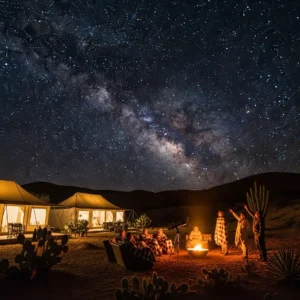
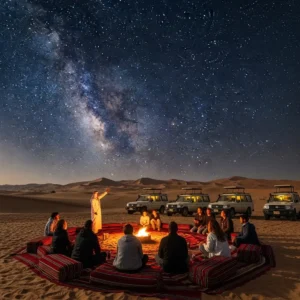
Astrophotography: Shooting the Milky Way Over the Dunes
The desert’s dark skies are perfect for astrophotography.
- Planning is Key: Use an app like PhotoPills or Star Walk to plan when and where the Milky Way will be visible. This is a highlight of any overnight desert photography safari.
- Camera Settings: Use a wide-angle lens with a wide aperture (f/2.8 or lower), set your ISO between 3200 and 6400, and use a shutter speed of 15-25 seconds.
- Light Painting: Use a headlamp or flashlight to gently “paint” light onto the foreground dunes during the long exposure to illuminate them and add depth to your image.
Wildlife Photography on Safari
While not as abundant as in other environments, the Arabian Desert is home to resilient wildlife. A telephoto lens is essential. Use a fast shutter speed to freeze motion and a wide aperture to blur the background, making the animal stand out. Be patient and respectful, never approaching too close or stressing the animals. Many organized tours from providers like https://hafiztourism.com/ can increase your chances of spotting wildlife.
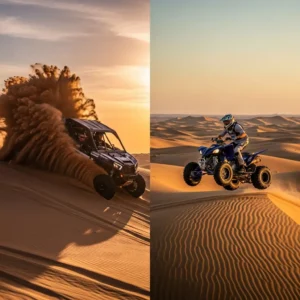
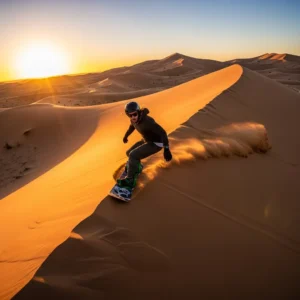
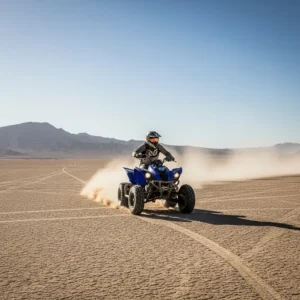
Action Photography: Capturing Dune Bashing or Sandboarding
If your desert photography safari includes adventure activities, you can capture some exciting action shots.
- Use a Fast Shutter Speed: A shutter speed of 1/1000s or faster is needed to freeze the motion of a speeding 4×4 or a sandboarder.
- Continuous Autofocus (AF-C): This mode will track the moving subject, keeping it in focus as you shoot.
- Burst Mode: Shoot in high-speed bursts to increase your chances of capturing the peak moment of action.
Abstract and Macro Photography in the Desert
Look for the small details. Use a telephoto lens to zoom in on the distant, layered patterns of dunes, creating a painterly, abstract image. Alternatively, get low to the ground and focus on the tiny details: the texture of a dried leaf, the pattern of cracked earth, or a beetle making its way across the sand.
Bringing Your Images to Life: Post-Processing Tips
Editing is the final step in bringing your creative vision to life. A good post-processing workflow can enhance the mood and impact of your desert photographs.
Adjusting White Balance and Colors
The light in the desert can fool your camera’s automatic white balance. In post-processing, adjust the temperature and tint to accurately reflect the warm tones of the golden hour or the cool tones of the blue hour. Use the HSL (Hue, Saturation, Luminance) panel to selectively enhance the oranges, yellows, and blues.
Enhancing Contrast and Texture
The desert is all about contrast and texture. Use the contrast, clarity, and dehaze sliders (in programs like Adobe Lightroom) to make the details in the sand and the clouds pop. Be subtle; a little adjustment goes a long way.
Dodging and Burning to Shape Light
This is a classic technique of selectively lightening (dodging) and darkening (burning) parts of your image. Use it to enhance the natural play of light and shadow on the dunes, guide the viewer’s eye, and add a three-dimensional feel to your photograph.
Common Mistakes to Avoid in Editing
- Oversaturation: Pushing the colors too far will make your image look unnatural and garish.
- Over-sharpening: This can create ugly halos around edges.
- Ignoring the Histogram: Make sure you are not “clipping” your highlights (making them pure white) or “crushing” your blacks (making them pure black), as this results in a loss of detail.
Conclusion: A Journey of Light and Patience
A desert photography safari is one of the most rewarding experiences a photographer can undertake. It is a journey that teaches you to see the world differently—to find monumental beauty in a minimalist landscape and to appreciate the subtle, fleeting dance of light across the sand. The challenges of the heat, wind, and sand are real, but overcoming them to create a stunning image is an immense satisfaction.
The desert is a patient teacher. It doesn’t give up its secrets easily. But for those who arrive prepared, who study the light, and who take the time to compose with intention, the rewards are immeasurable. You will return not just with memory cards full of breathtaking images, but with a renewed creative spirit and a deeper connection to one of the planet’s most awe-inspiring environments. The sands are waiting; it’s time to capture their story.
Frequently Asked Questions (FAQs)
1. What are the best camera settings for desert landscape photography? For general landscapes in good light, start with your camera in Aperture Priority mode (A or Av). Set your aperture to f/8-f/11 for a deep depth of field, your ISO to the lowest native setting (usually 100 or 200) for maximum quality, and let the camera choose the shutter speed. Always shoot in RAW format for the most flexibility in post-processing.
2. How do I prevent my camera from overheating in the desert? Keep your camera in a shaded bag when not in use. Avoid leaving it in a hot car. Use a light-colored towel or cloth to cover your camera if you must leave it on a tripod in the sun for an extended period. If your camera gives you an overheat warning, turn it off, remove the battery, and let it cool down in the shade.
3. What is the single most useful filter for a desert photography safari? A circular polarizing (CPL) filter is the most useful. It significantly enhances blue skies, reduces atmospheric haze to make distant dunes clearer, and cuts glare on sand and foliage, which saturates their colors. It’s a versatile tool that will improve your images in almost any bright-light situation.
4. Is it better to join a guided photography tour or go on my own? For a first-time trip, a guided desert photography safari is highly recommended. Guides know the best locations, the safest routes, and the optimal times to be there. They handle all the logistics, allowing you to focus purely on your photography. Experienced desert travelers may prefer the freedom of going alone.
5. How do I focus my lens to capture stars at night? Autofocus will not work in the dark. Switch your lens to manual focus. Turn on your camera’s Live View mode and digitally zoom in on the brightest star or planet you can find. Carefully turn the focus ring until that star is a sharp, tiny pinpoint of light. Once set, be careful not to bump the focus ring for the rest of your night shoot.
6. What is “exposure bracketing” and why is it useful in the desert? Exposure bracketing is a camera feature where it takes three or more photos in quick succession at different exposure levels (e.g., one normal, one darker, one brighter). This is extremely useful during sunrise or sunset when the contrast between the bright sky and dark land is too high for the camera to capture in a single shot. You can later merge these exposures into a single High Dynamic Range (HDR) image in post-processing.
7. Should I use a lens hood during my desert photography safari? Absolutely. A lens hood should be on your lens at all times. Its primary purpose is to block stray light from hitting the lens, which prevents lens flare and improves contrast. As a secondary benefit, it offers a physical barrier that helps protect the front element of your lens from bumps, fingerprints, and blowing sand.
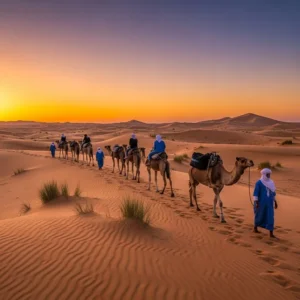
8. How do I capture the sense of scale in my desert photos? To show how vast the desert is, include an element of known size in your composition. This could be a person, a camel, a 4×4 vehicle, or even a lone tree. By placing a familiar object against the backdrop of massive dunes, you give the viewer an immediate reference point that emphasizes the immense scale of the landscape.
9. What’s the best way to clean a sensor if it gets dusty in the field? Cleaning a sensor in a sandy, windy environment is extremely risky and should be avoided if at all possible. Your first line of defense is an air blower. If that doesn’t work, it’s best to wait until you are back in a clean, indoor environment to use a dedicated sensor cleaning kit (swabs and solution). In the meantime, you can often clone out dust spots in post-processing.
10. How can I protect myself from the sun and heat while shooting? Wear lightweight, loose-fitting, long-sleeved clothing. Use a wide-brimmed hat to protect your face and neck. Apply high-SPF sunscreen regularly. Wear sunglasses to protect your eyes. Most importantly, stay hydrated by drinking water consistently throughout the day, even before you feel thirsty.
11. What is the “reciprocal rule” for shutter speed and why doesn’t it always work for digital? The old rule of thumb for hand-holding a camera was that your shutter speed should be at least 1 divided by your focal length (e.g., 1/200s for a 200mm lens). However, with today’s high-resolution digital sensors, camera shake is more apparent. A better rule is to use a shutter speed of at least 1 divided by twice your focal length (e.g., 1/400s for a 200mm lens) or to simply use a tripod for the sharpest possible images.
12. Is a full-frame or a crop-sensor camera better for desert photography? Both can produce stunning results. Full-frame cameras generally have an advantage in low light (better for astrophotography) and can capture a wider field of view. Crop-sensor cameras offer extra “reach” with telephoto lenses, which is great for wildlife, and they are often smaller and more affordable. The best camera is the one you have and know how to use well.
13. How do I find interesting compositions in a seemingly empty landscape? Slow down and observe. Walk around a potential area and look for natural lines, curves, and patterns in the sand. Pay close attention to how the light is interacting with the landscape and creating shadows. The best desert compositions are often simple and rely on strong graphic elements rather than cluttered scenes.
14. Are morning or evening golden hours better for photography? Both are fantastic, but they offer different qualities. Morning light, after a cool night, is often clearer and crisper. The evening light can be warmer and more dramatic, especially if there is some dust or haze in the atmosphere to catch the light. A complete desert photography safari experience should include shooting during both.
15. What white balance setting should I use? If you are shooting in RAW (which you should be), the white balance setting is less critical as it can be easily changed in post-processing. However, setting it in-camera gives you a more accurate preview. Use the “Daylight” or “Sunny” preset for most daytime shots, “Shade” or “Cloudy” to warm up photos taken in shadows, and “Tungsten” to get a deep blue during the blue hour.
16. How do I deal with lens flare when shooting into the sun? Sometimes lens flare can be a desirable creative effect. To control or eliminate it, use a lens hood. You can also use your hand or a piece of card to block the sun from directly hitting the front of your lens, just be careful not to get your hand in the shot. Stopping down your aperture to f/11 or f/16 can turn the flare into a more pleasing “sunstar” effect.
17. What’s the best way to carry my gear on a desert hike? A comfortable, well-designed photography backpack is essential. Look for one with a supportive harness and waist belt to distribute the weight. A bag that offers easy side access can be very convenient, allowing you to get your camera out without having to take the entire bag off your back.
18. How do I take sharp photos of camels during a ride? This is challenging due to the motion. You will need to use a fast shutter speed (at least 1/500s, but faster is better). Use your camera’s continuous autofocus and shoot in bursts. If you are photographing other camels from your own, try to time your shots for the smoothest part of the camel’s gait to minimize camera shake.
19. Is it ethical to rearrange the landscape (e.g., move rocks or plants) for a better photo? No. Following Leave No Trace principles is crucial. You should photograph the landscape as you find it. Moving natural objects disturbs the fragile ecosystem and takes away the opportunity for the next person to enjoy the same natural scene. The challenge and art of landscape photography lie in finding the best composition within the natural setting.
20. What is one non-photography item that is essential for a photographer in the desert? Electrolyte packets or tablets. Dehydration is a major risk, and when you sweat heavily, you lose essential salts (electrolytes) as well as water. Simply drinking plain water isn’t enough to replenish them. Adding electrolytes to your water helps your body absorb the water more efficiently and prevents dangerous conditions like hyponatremia.